Wednesday, December 19, 2012

XFire Laser Bike Light


                                                     X-FIRE Laser Light
Bike Lane Safety Light incorporates two 5-milliwatt red lasers & 5 led's with solid or blinking modes
                                  tail light mounted like a traditional bike blinker
              X-Fire projects two laser lights that form a sort of virtual bike lane around a bicycle
              In stock $37.00 Would make a great gift for your cyclist!


Monday, August 20, 2012


A Saddle for Vic

A few months ago Vic gave Justin some old saddles to send me so I could practice my skills at replacing the leather. Well, last weekend I finally decided it was time to make one for Vic in thanks for the dead ones he contributed. This is my 25th, counting failures.

I started by cutting a rough blank from a piece of 'sole bend' cowhide, the thickest stuff you can get. It's from Mexico. I then traced the exact pattern for a saddle onto it and cut it out with a utility knife. It takes a sharp blade!

When I'm making a saddle, one of the things that proves the most difficult is getting the leather perfectly placed on the frame. I never know exactly why, but for one reason or another the leather is often too far forward, or backward, or off to the side, from where I want it. So to prevent this, on the underside of this saddle I measured out exactly where the rivets would go, and drilled the holes while the leather was still flat and dry (this was a mistake, as we will see).

I then drew an ink line around 3/4” from the edge of the leather, and attached the leather to a plywood platform with sheetrock screws, one at the nose, two at the back. This keeps the leather from moving around while I work on the back, and therefore keeps the top from getting scratched up. I hold the plywood platform in a portable workbench.

Next I beveled the edge of the leather all the way around. The raw leather was about 5/16” thick, and I beveled it from the ink line towards the edge, until the leather at the edge was 1/8” thick. I did most of this with a wood rasp, then tidied up the rough edges with a block plane and sandpaper, then unscrewed it from the plywood platform and dropped the leather in a bucket of clean cool water.

While it was soaking I took a 40-year old Wrights W3N saddle (just like one of the ones Vic had sent me) and pounded the rivets out of the decrepit leather. I and cleaned most of the rust off the rails and cantle plate, greased the threads on the tension bolt, and generally tried to make it look presentable. A Wrights frame is just like a Brooks frame, but the nose piece on the Wrights is painted black (a Brooks one is chromed) and the bag loops on the Wrights don't have eyelets in them (a Brooks one does).

Four hours later, just before I took the leather out of the water, it looked like this. You wouldn't want to drink this water, trust me!

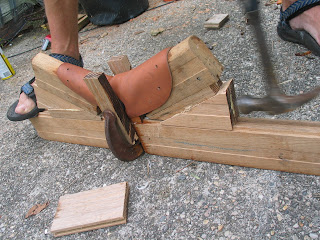
Now the real fun begins. This piece of leather is basically flat, like a tortilla. But I want to stretch the edge out without stretching the middle, so it takes a shape more like a potato chip. To do this, I have made this jig from two layers of red oak tongue and groove flooring.

I drape the dripping wet leather over the top of this jig and clamp it to that center piece. 

To clamp it, I need to apply a lot of pressure in one place on the top, so I can pull up the bottom without leaving marks anywhere else. So for this purpose I am using two old plastic checkers that you may have noticed in the second photo, above.  They are about 1 1/4” in diameter and have an interesting radial pattern around the edge, but the interior is deeply recessed so it won't touch the leather at all (though there is a cool crown design there). I clamp the leather to the jig with a big C-clamp, more pieces of oak flooring, and the two checkers. I made that C-clamp absolutely as tight as I could.

Then I hammered in the wedges that you saw in the photo of the jig.  It takes the leather a little while to stretch, so I hammer the pieces in a little from each side, wait a few minutes, and tap them in a little farther. 

When they are all the way in, it's time to let the leather rest and stretch.  Time to quit for the day!

In the morning I took the leather top, still pretty wet, out of the jig. The checkers were deeply impressed into the leather, so I had to pull them out. Holding the leather in my hands, I used my fingers to form it into the shape of a saddle, then attached it to the nose piece and then to the frame with stainless steel bolts and wingnuts.  My son took a bunch of photos while I did this, but they did not come out.  Sorry!

These screws and wingnuts are not really necessary at all; I could just go ahead and rivet it at this point. But I prefer to do screws for now, because they are quick and reliable. They let me get the whole thing into the shape of a saddle quickly, so I can concentrate on the fun stuff. This is probably the most fun part of the process, because in a matter of minutes this floppy shapeless piece of leather begins to look like a saddle. Pressure from my thumbs is all it takes to curl the back down around the edge of the cantle plate, and the front down around the nose piece. With a little encouragement it takes back all the stretching I've inflicted on it. It helps that this is the part of the leather that I shaved thin. For several minutes I hold the saddle in my hands, pressing and pushing and pulling wherever it seem necessary, forcing the wet leather into the shape of a saddle. It won't be perfect; the leather is still too wet to hold the perfect shape, but the better I can make it now, the better it will be when finished. So I leave it like this for a few hours, picking it up now and then to remind it of the shape I want.

Meanwhile, I prepare the rivets. I buy plain copper tinner's rivets, which have a fairly thick head on a 3/16” shaft. My anvil is a piece of a steel I-beam from some construction project. I have drilled a 3/16” hole in this, that holds a rivet nicely so I can pound its head thin. I place a rivet in the hole in the steel beam, then beat the head of the rivet with a hammer. The head starts out about 3/8” wide and more than 1/16” thick, and I pound it until the head spreads out to almost double and very thin. I'm not good at pounding them out flat; they always end up a little lopsided and uneven. To fix this I put each rivet in an electric drill and spin it against a file. This results in nine rivets of all slightly different sizes. Hey it's a hand made product, what did you expect?


We didn't get any photos of pounding the rivets, but here you can see my I-beam anvil with three raw rivets at the top, then five that I have pounded out flat, and three that I've filed. The hole, where I pound them, is at the lower left.

The rivets have to be installed in the right order. First is the one at the top of the nose piece. I enlarge the hole in the leather with a tapered awl, push the rivet through the leather and the metal, then pound a centering punch into the end of the shat to spread it out as far as possible. I then switch to a long punch with a flat end and give it a dozen or so firm blows with a 3-lb ball peen hammer to mushroom out the end of the rivet.  By this time my son was tired of taking photos, so this step lacks documentation.  Kids are spoiled, you know?

Anyway, the rivets on the side of the nose piece are difficult. There's no way to pound them from the inside of the nose piece, so I have to hammer directly on the head of each rivet, holding the nose piece on the edge of the anvil, which is thin enough to fit all the way inside the nose piece. Again, a dozen firm blows of the hammer are enough to squash the shaft of the rivet into a mushroom shape and embed its head into the surface of the saddle. Then I install the cantle plate rivets. The first two, at the center, are pretty easy, but the next two pairs are more difficult owing to the saddle rails. One way or another you have to get the punch on them and pound them several times.

When I got to the last two rivets on this saddle, I realized the mistake of pre-drilling all nine holes in the leather. The last two holes were in the wrong place, about 3/8” in front of where I now wanted them. Doh! I drilled new holes and went ahead with the project, but the astute observer will see the two useless holes peeking from under the edge of the rivet. Too bad! 

Will this cause any real problems? I just don't know. A true professional, at this point, would take off the leather top and start over. Well, there you have it: I'm an amateur.

Nine rivets in place, I return to shaping the leather. Again I press the edge of the leather together around the nose piece and cantle plate, allowing the leather to take up any slack that may be left over from the violent stretching I applied earlier. Every time I do this, I am amazed at how far the leather will shrink where I want it to.

All the while, the leather is gradually drying, and becoming better able to hold the shape I force upon it. I have a nylon burnishing tool with which I polish the leather, rubbing and pressing every inch of its surface. This compresses the surface of the leather, making it hard and shiny. I rub away dents and scratches by burnishing the area around them.


Finally I add some decoration. I incise a line around the edge, and finally impress Vic's logo into the medallions I stamped on the side. I did this with a flat bladed screw driver.  The leather is still pretty wet, and soft, at this point.

I also impressed my initials on the back of the saddle. The artist must sign his work!

Monday evening, I burnished the top some more, and then applied a mixture of beeswax and neatsfoot oil into the top. This stuff goes on like a greasy paste, but by Tuesday evening the leather had soaked up the oil, leaving a coating of wax at the surface, A little buffing makes it all shiny and, we hope, water resistant.

Wednesday, it was in the mail.  Good luck with it, Vic!  I'd appreciate if you'd post a photo of it every thousand miles or so.

Rudi

Wednesday, July 18, 2012

A Long Island Century


I recently visited the Empire State for the first time to ride a century. I’ve been a part of a small email group of vintage cycling nuts like myself for a couple of years now and when the group began planning a century tour of the eastern part of Long Island (where one group member spends his summers) I took the opportunity to see a part of the US I hadn’t yet visited and to finally meet, face to face, many of these guys with whom I’ve traded parts, sought wrenching advice and discussed the finer points of all things cycling.

I flew into JFK and traveled to Penn Station to meet up with one member where we enjoyed several Belgian beers while waiting for another to finish up his day at the office. Then three of us took a cab to the Meat Packing District and enjoyed the beers and food offerings at the Standard Hotel Biergarten before taking a rental car to our host’s home in central Long Island.


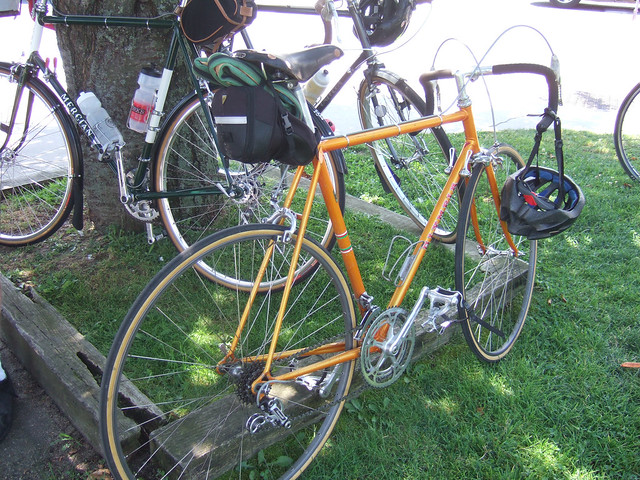
Much of Friday was spent preparing our bikes for Saturday’s ride and "talking shop" as various guys trickled in by car or train and set up tents in yard. I didn’t travel with my bike. Since our host rides the same size frames as I do he offered to loan me a bike, a Dutch made Cera 531 frame with a mixed drivetrain that just plain works. As was to be expected, all of the bikes were vintage (or at least classic) bikes with lots of character. Present were a 1972 Mercian, a 70s Wes Mason, a modified Lambert with homemade LED lights and an SX3 hub, an 853 Lemond, an early 70s Olympia, an ’83 Waterford Paramount, ’79 Peugeot PK-10, 80s Univega Gran Turismo, the 650b Bilenky Constructeur tandem built for the 2010 NAHBS and reviewed by Bicycle Quarterly in Volume 9, No. 2, among others.
Wes Mason and Lambert by sommervillebikes
Early 70s Olympia by sommervillebikes


Bilenky Constructeur tandem by sommervillebikes
Cera

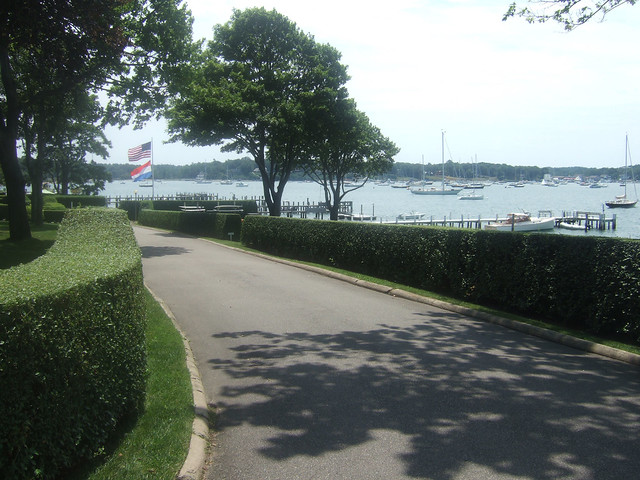
Our host had thoroughly planned a 116 mile route of the eastern half of the island, taking us through small beach communities, the Hamptons, farms, wineries, historic points of interests and the like.  The terrain was relatively flat (~2,700 ft of climbing) as compared to most of the riding we do here in Louisville and the surrounding area, but it’s not “pancake” flat like you’ll find in south Florida or the like. The roads are generally in very good condition and bike lanes are plentiful.

Our route

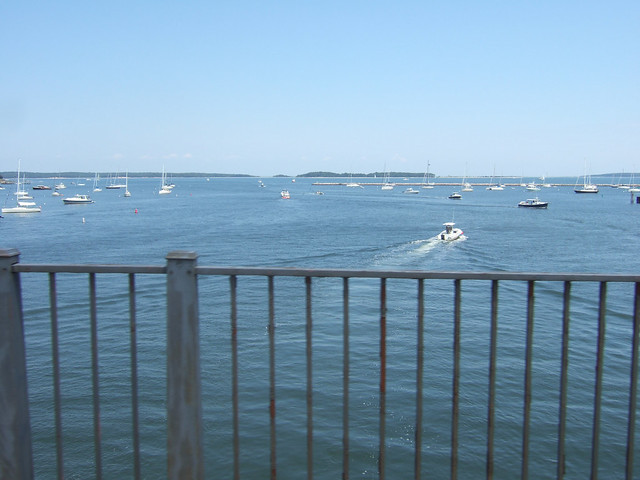
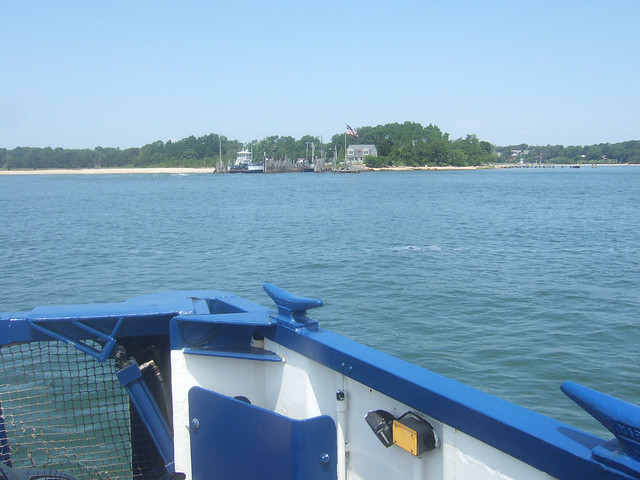
We set out just before 6am on Saturday and traveled a few miles to a diner to fuel up. One of the riders had traveled from New Hampshire and had brought a jug of New Hampshire Grade B (darker and richer) maple syrup, which is rarely, if ever shipped out of state. That beats colored corn syrup on your flapjacks for sure. We headed east around the south shore of the island, took two ferries to navigate the eastern tip of the island and back along the north shore of the island.

photo by sommervillebikes

Dune Rd by sommervillebikes


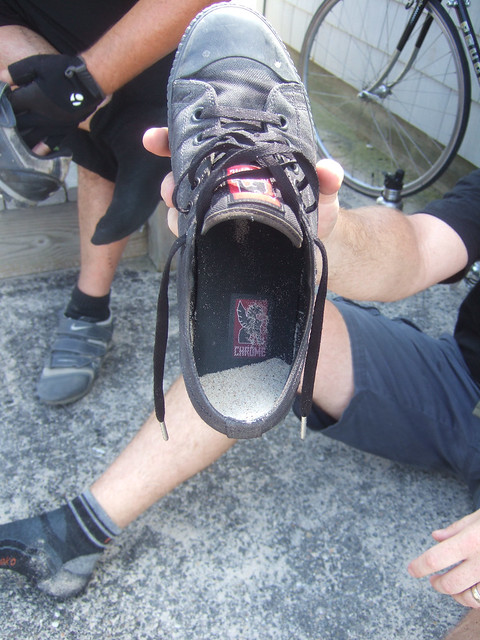
It was a great ride, with a high in the low 90s and high humidity, to which we here are accustomed. The riding was great, but the camaraderie, conversation and new terrain and things to see made it special for me. Perhaps the most interesting part of the ride was what we referred to as The Great Portage, a 400 yard traverse of a beach to connect with another road. Ah, shoes full of sand!

photo by sommervillebikes

The Great Sand Purge by sommervillebikes

It was a great weekend for me and I’m thankful to have had the opportunity to have done it. Many thanks to our gracious host and family for the detailed planning and a fantastic ride!

photo by sommervillebikes

photo by sommervillebikes

photo by sommervillebikes


photo by sommervillebikes

photo by sommervillebikes
by Justin


Tuesday, July 3, 2012

"Product Testing" Brake Levers Odyssey & TRP

I ride several bikes with riser handlebars. I like to chop off a little of the length at the ends of the bars.  The handlebar, grips, and brake levers all come together to form the cockpit area to make clean looking bike. I like two brands of brake levers... Odyssey & TRP, both in the BMX style.  They are small, nice looking.  Both levers work great, with a nod to Odyssey for braking force applied. TRP levers are super slick and  nicely polished. Odyssey uses replaceable brass bushings and includes an extra set of bushings. TRP uses sealed bearings, a forged bracket, and a lever. The levers are available for right and left configuration. So the next time you are setting-up your Fixie or Super Sweet Single speed take a look at these brake levers. Thanks for checking in... see you on road.

by Perry 

Friday, June 29, 2012

Ian & Natalies first anniversary

Ian and Natalie decided to give each other new bicycles for their first anniversary.  They did their homework through extensive research and shopping.  Natalie knew as much about Public Bikes as we did from her research.  They visited several of the bike shops in the Highlands and tried out numerous bikes.  Ian chose a Purefix single speed and Natalie a 7 speed Public Bike.  She found the quality and style of her Public Bike to be just what she was looking for.  Add the free lifetime tune ups at VCB,  free rack & basket plus Perry's service oriented sales approach and their search was over.   
Happy anniversary Ian and Natalie!  
We look forward to taking care of your bikes for many years..

Vic

Sunday, June 24, 2012

Vic's Sunday Morning LBC Ride


Summer is in full swing, sunny skies, warm temps. On this beautiful morning 56 riders showed-up for a 25 mile outing. We traveled city streets to Butchertown, and went out River Rd. (The Ohio river was looking especially inviting today.  It looked like a huge lake all calm and smooth.)  Next we went up Lime Kiln and down Glenview back to River Rd.   From there we went up Indian Hills to St. Matthews, through Seneca & Cherokee Parks to the Highlands, and back to Vic's Classic Bikes.  A good time was had by all.  If you have the time on a Sunday morning it's a standing  invitation... Come ride with us!
by Perry

Friday, June 22, 2012

"Product Testing" Finish Line Ceramic Wet Chain Lube

For lubing bicycle chains over the years I have used practically everything under the sun.  Three in one oil comes to mind early on, engine motor oil, WD-40, Tri-Flow, many different spray lubricates, wet and dry graphite the list is long. Searching for a really good quality product to lube bicycle chains is relatively easy now a days. Most of my riding is done on the streets "black top" not gravel, not dirt trails. I like quiet running chains be it single or multi-speed drive train. Wet lubes seems to be the way I choose to go. In the last 3 or 4 years ceramic this...ceramic that...has been the buzz. So I thought here is a product with the latest greatest stuff in it... well since sliced bread. Finish Line Ceramic WET Bicycle Chain Lube so I got some and gave it a try (after reading about this product I couldn't resist). Here's the really good part,  it's GREAT STUFF! flows on smooth doesn't clog up (no need to shake the bottle), penetrates into rollers well, gives you a super quiet running chain, waterproof stays on the chain, doesn't sling all over the place so its not messy. It lasts for a good long while. No annoying fragrances or dyes. It's white clean looking right? Well it turns black pretty quick, this products works extremely well as advertised. Any how... that's my story and I'm sticking to it. Thanks for stopping by. 
Perry

 http://www.youtube.com/watch?feature=player_embedded&v=yXwexH0tjRM#!


Thursday, June 21, 2012

Schwinn Peloton 58cm $650.


Cinelli bar & stem, Suntour Superbe Pro shifters, derailleurs, Sugino 75 crankset 53-42 chainrings, 7 speed cassette, Rolls saddle, Tange headset, Royal Grand Compe brakes calipers & brake levers, Frameset lugged, Columbus tubing, tubular (sew-ups) tires, araya hoops, Suntour Superbe Pro hubs
Comes with 90 DAY UNCONDITIONAL WARRANTY & UNLIMITED LIFETIME TUNE UP

 http://www.vicsclassicbikes.com/

by Perry

Monday, June 18, 2012

PURE FIX Cycles "Fixie"


                                                 "GET YOUR FIX ON"


                                   PURE FIX Cycles 
                                             Vic's newest line
                                              sizes: 50cm  54cm  58cm
                                       Multitude of Colors       
                                                 Standard features include:
                           flip flop hub (fixed & freewheel) 
                           gearing 44 x 16 = 74.25 gear inches
                          50mm deep dish wheels, 28mm tires 
                                               front brake
                                     MSRP  $325.00 American 

by Perry

Sunday, June 17, 2012

Vic's Anniversary Ride 2nd Annual


                              Father's Day June 17th 2012 

Forty-Seven riders strong rode this Louisville Bicycle Club ride today out of Vic's Classic Bikes on the 2nd Anniversary of Vic's Classic Bikes in this location.  This is a regular Sunday morning ride feel free to try it out. Vic's wife Laura treated us to a food fair... fruit bowl, yogurt, coffee, juice, milk,  and doughnuts. Wonderful fuel for cyclists after a great ride.  Thanks to all the riders for coming out!  Special thanks to Vic and Laura for a really good time.
by Perry

Friday, June 15, 2012

PUBLIC Bikes


Yes! PUBLIC Bikes are in the store ready to ride, we've had two shipments. The first ones went flying out the door! These are the PUBLIC Bikes C7 models,  Mens and Women's in stock $595. Come by, check these sweet machines out!!! Classic European city bikes designed for today's urban environment.
Special Limited time offer:
Free Color matched Rear Rack w/ Spring Clip a $60 value with bike purchase. 

by Perry


"Product Testing" Finish Line Ceramic Grease

Working around the shop overhauling bottom brackets, wheel bearings, headsets, lubing stems, pedals threads, seat posts, and  bolts threads. I could name a few more but why!!! Requires one to apply grease to these parts. This is like re-living childhood... getting to play with a substance (grease) that ends up everywhere, where you intend for it to go and every place in between. After years of experience handling and working with  various brands, multitudes of colors grease is not the same. The feedback in your fingers of what is good in the way of grease (the way in feels... tackiness, sticky, thick or thin, smooth texture, stringy). Life is an ongoing process... so are new cycling products today its grease. Synthetic grease with teflon-infused ceramic nano-bits, what's not to love? The color is white it has a nice clean look. The feel is right! This product works with steel or ceramic bearings that's a plus. Time will tell how good it really is. I need to go clean-up... thanks for checking in.
by Perry

 http://www.finishlineusa.com/products/ceramic_grease.htm

Monday, April 30, 2012

A Bike Built For Mom

I couldn't build a bike for my dad and not my mom. Hell, I'll build a bike for just about anyone who'll ride one and mom seemed keen on riding. That was all the encouragement I needed. 


My mother grew up poor and never owned a bike of her own. She doesn't have the great childhood memories of riding bikes everywhere all the time that many of us hold dear. It seems all this "bike joy" had pent up her entire life because when she let out an audible "weee!" on her first downhill coast, it was unquestionably sincere. 


I chose a mid 70s Peugeot UO-18C mixte frame as the platform for the build. It's the right size for her and the mixte design will ensure easy mounting/dismounting for many years to come. She has some upper vertebrae injuries so an upright position was called for. The Nitto Dove bars were perfect. While I'm a big fan of derailleur drivetrains, I chose the new Sturmey Archer X-RF5(w) wide range 5 speed IGH for mom's bike. Coupled with the thumb shifter it's a no-nonsense, no-worries drivetrain perfectly suited to an inexperienced cyclist. 


The wheels were built by Vic and I with polished 700c CR-18 rims and Sapim double-butted spokes. The front hub is the economical Sanyo H27 dynamo (generator) hub we're fond of here. I like the centerpull brakes so often found on vintage bikes, but in the interest of maximum efficiency and minimum maintenance I upgraded the bike with the Tektro R559 calipers and FL750 levers. Her bike has confidence-inspiring braking; perfect for the hills of western Kentucky. 


To tackle the climbing part of those hills I paired a 42t chainring on the Stronglight 93 crankset with a 21t Nexus cog on the hub. This pretty much gives her two climbing ratios, two cruising ratios and one to bomb down the hills. 


Being a horse rider most of her life she really appreciated the Brooks B18 Lady's Model saddle. I installed PDW "Bourbon" grips that match the saddle well, Velo Orange sealed bearing touring pedals (these are so lightweight and grippy!) and Spanninga and Planet Bike lights. The Peugeot "brrrring, brrring" bell was a kind gift from a fellow vintage bicycle enthusiast in Paris who wanted to contribute something to a bike I was building for my mom. 


Happy riding to all you mothers out there!


By Justin Hughes